It's been a while since I last blogged about anything...
Something that's been bothering me for a long time since I've been on Twitter, are bit.ly links.
Naturally Bit.ly links got a serious boost in usage with Twitter's launch, and they serve a great tool of compacting links and embedding them beautifully inside Tweets.
However, many times, looking at those links, you can't help but wonder - "where will it take me if I click it? Am I going to get a worm or a virus on my laptop?"
Sometimes, people are just lazy to put any context telling you what this link is about, and so, they tweet or post a bit.ly link with their cat's photo.
(Usually it is not their cat's paw-n-shop ya' know...).
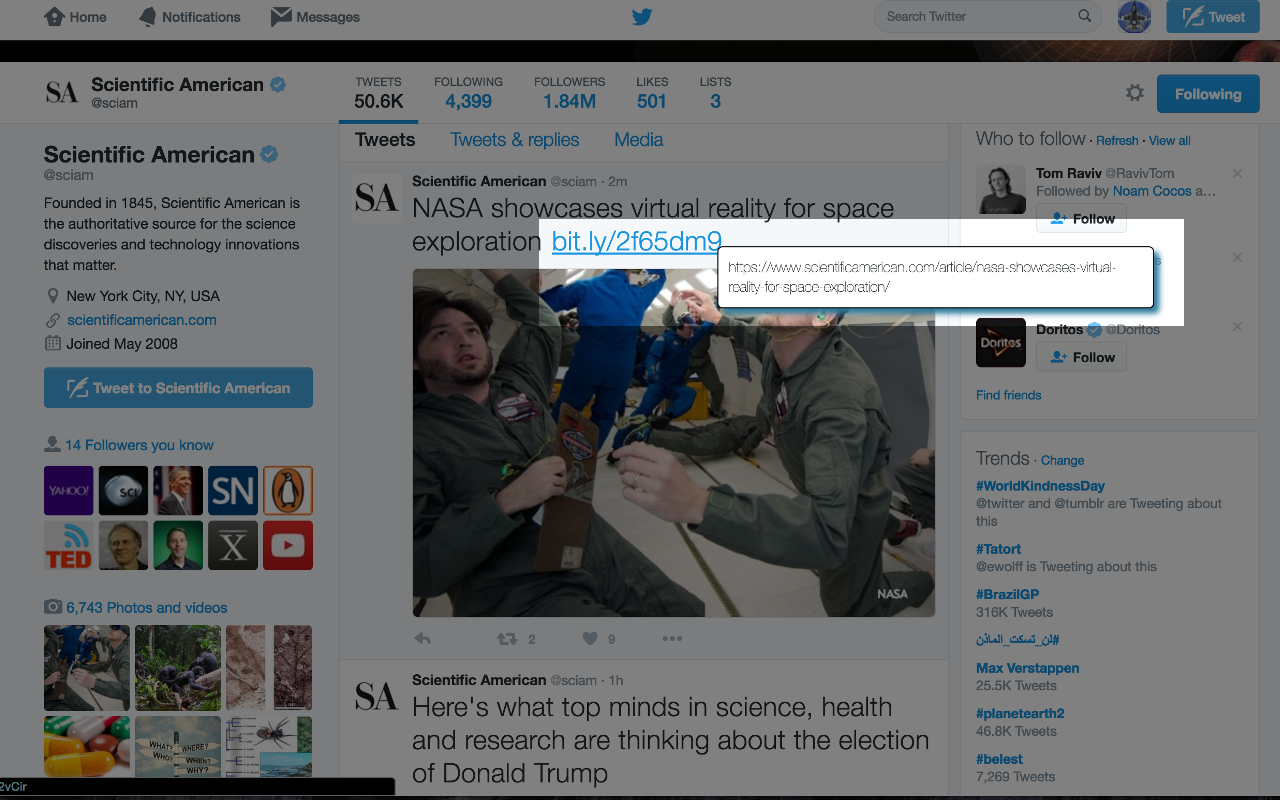
So being very lazy that I am, yet curious as a cat.. I decided to pick up the glove, and create my very own Chrome extension (sorry y'all other folks using other browsers), that shows you the REAL URL behind that bit.ly link you're gazing it right at this second, simply by hovering on it.
Welcome - Bit.ly Resolver Chrome Extension
You can simply click it, in order to install that extension on your browser.
GitHub link for those of you who are interested:
As a bit.ly :) : http://bit.ly/2fzMal8
Or simply as: https://nirgit.github.io/bitlyResolverCE/
See you in a bit.ly!
Showing posts with label Free. Show all posts
Monday, November 14, 2016
Monday, May 9, 2016
Hubot Script for Image Search on Bing
How to write a Hubot script that integrates with Bing in Javascript
In case you haven't heard of Slack, I recommend you check it out.Slack is a Messaging App with an extremely cool edge of customization abilities.
One of those abilities allows you to install an App that plugs-in to Slack, called Hubot.
A Hubot is a Bot app, that can listen to your commands on Slack, and perform a task.
After installing your Hubot on your machine, you will notice it has a "scripts" directory.
You can use this directory to write your own custom scripts which the Hubot will execute!
Very cool!
The scripts can be written in CoffeeScript and in Javascript.
You can simply copy-paste the code below, but notice that it will not work, unless you get your own Bing API key.
You can easily get it for free here.
This is how the screen looks like at Bing after you will (create an account as needed and) login.
Be sure to copy the API Key that (highlighted in red) shows in the box,
and replace it with the 'key',
which equals to 'XXXX-....-XXXX' in the code below.
The expected result
Enjoy hacking & slacking!
Nir
The code
// bing.js
'use strict'
var querystring = require('querystring');
var http = require('https');
// replace the 'XXXXX...' string here with your own Bing API KEYvar key = 'XXXXX-XXXXX-XXXXX-XXXXX';
var HOST_NAME = 'bingapis.azure-api.net';
var DEFAULT_NUMBER_OF_IMGS = 20;
var SAFE = {
low: 'Off',
medium: 'Moderate',
high: 'Strict'
};
var HTTP_REQUEST_HEADERS = {
"Accept": "*/*",
"Content-Type": "application/json",
"Ocp-Apim-Subscription-Key": key
};
function getParams(query, count, offset, safe) {
count = count || DEFAULT_NUMBER_OF_IMGS;
count = Math.max(5, Math.min(50, count));
offset = offset || Math.floor(Math.random() * 4);
return {
'hostname': HOST_NAME,
'method': 'GET',
'path': buildQueryParameters(query, count, offset, safe || SAFE.medium),
'headers': HTTP_REQUEST_HEADERS
};
}
function buildQueryParameters(query, count, offset, safey) {
return '/api/v5/images/search?q=' + query +
'&count=' + count + '&offset=' + offset +
'&mkt=en-us&safeSearch=' + safey;
}
function getImagesFromBing(query, hubotCallback) {
var body = [];
var params = getParams(query);
var req = http.request(params, function(res) {
res.setEncoding('utf8');
res.on('data', function (chunk) {
body.push(chunk);
});
res.on('end', function () {
var data = body.join('');
var dataAsJson = JSON.parse(data);
var values = dataAsJson.value;
var imgs = values.map(function(val) {
return val.contentUrl;
});
hubotCallback(imgs);
});
});
req.end();
}
module.exports = function(robot) {
robot.hear(/bingme (.*)/i, function(res) {
var photoname = res.match[1];
res.reply("Looking for a photo of \"" + photoname + "\" on Bing!");
var escapedQuery = querystring.escape(photoname);
getImagesFromBing(escapedQuery, function(imgs) {
var randomPhotoIndex = Math.floor(Math.random() * imgs.length);
res.send(imgs[randomPhotoIndex]);
});
});
}
Labels:
Example,
Free,
Fun,
Hubot,
Javascript,
Node,
Script,
Slack,
Source Code
Sunday, January 17, 2016
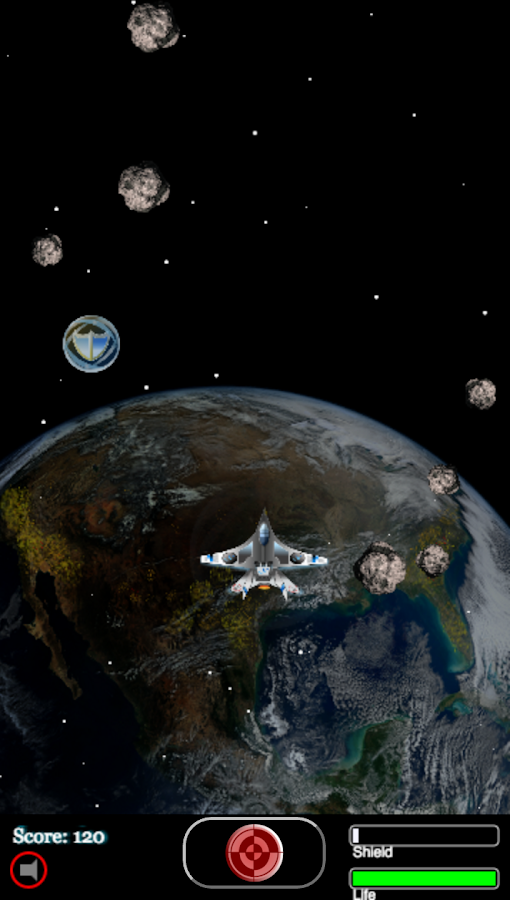
Spaceship X - Game Launch on Android Play
Spaceship X - Timeless Hero
A retro flavoured Spaceship shooter saving the Galaxy!
Exciting!
I have released my first Game App to Google Play!
It is free to download:
https://play.google.com/store/apps/details?id=nm.ibex.spaceshipx
The game's website:
http://leapingibex.wix.com/spaceshipx
Have fun!
Labels:
Android,
App,
Free,
Front End,
Fun,
Game,
Javascript,
Space,
Spaceship,
Spaceship X
Saturday, April 18, 2015
Simple Webapp example using Flux with React
If you've been following the latest Front-End news for Web for the past year,
you have probably seen the huge buzz around ReactJS.
Just in case you haven't, you can visit ReactJS on the Facebook Github's page at: https://facebook.github.io/react/ or just Google it and read about it.
So for those of you that do know what React is all about, you may have also heard about Flux.
If you haven't :) I recommend you to read about it a bit
here as well http://facebook.github.io/flux/docs/overview.html
If I have to try and sum it up on one leg, I'd say that Flux is an application architecture for building
big web-apps on the front-end that scale. - Well, that's pretty vague :)
A main concept regarding this architecture is about a Uni-directional flow where an "Action"
(a Application Event) is triggered by the View part (Your components, which are shown the users),
using a "Dispatcher" (Some kind of an Event Hub) which propagates the Actions
on to the "Stores" (Your application's model), which hold the state (data) of your application,
perform the necessary update and logic, and updates the View back using listeners.
This illustration might help understanding the Flux flow a little better:
Why is Flux a good idea? - There are several reasons, but I will mention only 2 which I think
are the most important.
1. Simple Application Architecture - You can show this diagram to someone who never
heard of Flux before, and explain it in 2 minutes.
2. Scalable - Flux lets you scale. Meaning, it's relatively easy to add new features to
your application, debug it, and keeping it performant.
Why?
There's a really good talk about it by Facebook which is worth watching:
After all that being said, I really wanted to do some basic implementation of Flux myself,
to "feel" how it works. And so I created a very small Repository on Github that implements
Flux which you are welcome to look at and use.
The code uses several 3rd party libraries such as RequireJS and React Templates but even if you are not familiar with RequireJS, or with AMD, my guess is you will still be able to understand how
it works.
React Templates is an amazing 3rd party library that helps you implement the "render" method
of React Components in an HTML like syntax. Totally cool.
Good luck!
you have probably seen the huge buzz around ReactJS.
Just in case you haven't, you can visit ReactJS on the Facebook Github's page at: https://facebook.github.io/react/ or just Google it and read about it.
So for those of you that do know what React is all about, you may have also heard about Flux.
If you haven't :) I recommend you to read about it a bit
here as well http://facebook.github.io/flux/docs/overview.html
If I have to try and sum it up on one leg, I'd say that Flux is an application architecture for building
big web-apps on the front-end that scale. - Well, that's pretty vague :)
A main concept regarding this architecture is about a Uni-directional flow where an "Action"
(a Application Event) is triggered by the View part (Your components, which are shown the users),
using a "Dispatcher" (Some kind of an Event Hub) which propagates the Actions
on to the "Stores" (Your application's model), which hold the state (data) of your application,
perform the necessary update and logic, and updates the View back using listeners.
This illustration might help understanding the Flux flow a little better:
Why is Flux a good idea? - There are several reasons, but I will mention only 2 which I think
are the most important.
1. Simple Application Architecture - You can show this diagram to someone who never
heard of Flux before, and explain it in 2 minutes.
2. Scalable - Flux lets you scale. Meaning, it's relatively easy to add new features to
your application, debug it, and keeping it performant.
Why?
There's a really good talk about it by Facebook which is worth watching:
After all that being said, I really wanted to do some basic implementation of Flux myself,
to "feel" how it works. And so I created a very small Repository on Github that implements
Flux which you are welcome to look at and use.
The example code
The application built on top of that is a classic Todo App: https://github.com/nirgit/Flux1The code uses several 3rd party libraries such as RequireJS and React Templates but even if you are not familiar with RequireJS, or with AMD, my guess is you will still be able to understand how
it works.
React Templates is an amazing 3rd party library that helps you implement the "render" method
of React Components in an HTML like syntax. Totally cool.
Good luck!
Labels:
Example,
Flux,
Free,
Front End,
Github,
Javascript,
React,
React Templates,
ReactJS
Sunday, June 16, 2013
Lottery for winning a copy of the "Android NDK Cookbook" is now opened
In continuation to last week's post for winning a free copy of the eBook "Android NDK Cookbook",
the lottery starts today!
3 Lucky people will be given a free copy of the "Android NDK Cookbook" sponsored by "Packt Publishing".
containing a subject line "Android NDK Cookbook lottery".
the lottery starts today!
3 Lucky people will be given a free copy of the "Android NDK Cookbook" sponsored by "Packt Publishing".
Description of the book
Android Native Development Kit Cookbook will help you understand the development, building, and debugging of your native Android applications. You will discover and learn JNI programming and essential NDK APIs such as OpenGL ES, and the native application API. You will then explore the process of porting existing libraries and software to NDK. By the end of this book you will be able to build your own apps in NDK apps.
Check it out on Packt Publishing: http://www.packtpub.com/android-native-development-kit-cookbook/book
How to participate?
Simply send an email by clicking here or by sending it to
containing a subject line "Android NDK Cookbook lottery".
Deadline
The contest will close on 30th June 2013. Winners will be contacted by email, so be sure to use
your real email address!
Good luck !
Saturday, June 8, 2013
Win a free eBook copy of "Android NDK Cookbook"
Are you an Android developer or interested in Android development?
This might interest you!
Further details of the book can be found here: http://www.packtpub.com/android-native-development-kit-cookbook/book
Stay tuned for the 16th of June!
* The copy of the book is sponsored thanks to "Packt Publishing".
This might interest you!
On the 16th of June 2013 I will conduct a lottery on the blog, to win a free eBook copy of "Android NDK Cookbook".
The lottery will last for 2 weeks (until June 30th) where you will be able to participate to win a free copy of the book.Description of the book:
"Android Native Development Kit Cookbook" will help you understand the development, building, and debugging of your native Android applications. You will discover and learn JNI programming and essential NDK APIs such as OpenGL ES, and the native application API. You will then explore the process of porting existing libraries and software to NDK. By the end of this book you will be able to build your own apps in NDK apps.
Further details of the book can be found here: http://www.packtpub.com/android-native-development-kit-cookbook/book
Stay tuned for the 16th of June!
* The copy of the book is sponsored thanks to "Packt Publishing".
Friday, March 8, 2013
GWT Chrome extension with JSONP Server communication
I thought this post would be a good idea for people who want to know how to make an 'end-to-end'
GWT Chrome extensions, with a connection to a server of their own.
While this demonstrates specifically how to enable to communication from a Chrome extension, there is
no difference in code if you wish to deploy your client code else where (not on Chrome).
Many web applications choose to deploy their Server code & Client code on the same application server, like JBoss or Tomcat.
As you know in GWT there are several ways to communicate with a server.
One of them is RPC for instance, which gives you the ability to invoke methods on a Java interface,
not having to deal with anything but Java code. Which is cool, as it makes a very smooth transition from
the client side code to the server side code.
However, when we want to implement this in a Chrome extension things get a bit trickier.
The reason is that you'd have to separate your server module from your Chrome extension module
(as we can't deploy Server side classes to Chrome - it runs only JavaScript),
and would need a shared model between the two in order to communicate.
It's not hard to do at all, it's only a longer example to make.
(In Eclipse, if you create a new "Web Application Project" using Google's plugin, you will have the client & server code in the same project, with a "shared" directory which serves a model bridge between the two).
Another option that exists, is using JSONP communication to the server.
In our case - this makes it a lot simpler.
We will expose some REST API on a Server we'll implement, for getting images, and send a JSONP request from the QuickPik extension to retrieve those images. Obviously, it can be anything else you want it to be in your application.
TO THE CODE!!!
The Server
In order to create a REST service and expose it, we will use the Jersey library which is an implementation for
building RESTful web services. It's very simple.
The following QuickpikService class, is our REST service:
package quickpik.server.web;
import java.io.IOException;
import java.io.InputStream;
import java.net.MalformedURLException;
import java.net.URL;
import java.util.Date;
import javax.ws.rs.GET;
import javax.ws.rs.Path;
import javax.ws.rs.Produces;
import javax.ws.rs.QueryParam;
import javax.ws.rs.core.MediaType;
import org.codehaus.jettison.json.JSONException;
import org.codehaus.jettison.json.JSONObject;
import com.sun.jersey.api.json.JSONWithPadding;
@Path("/quickpik")
public class QuickPikService {
private final static int BUFFER_SIZE_IN_BYTES = 1024;
private final static String FLICKR_API = "http://api.flickr.com/services/feeds/photos_public.gne?format=json&tagmode=all&tags=" ;
@GET
@Path("searchPhotos")
@Produces({ "application/x-javascript", MediaType.APPLICATION_JSON})
public JSONWithPadding getPhotos(@QueryParam("searchExp") String searchExp,
@QueryParam("callback") String callback) {
// "log" the call
System.out.println("[" + new Date() + "] searching for: " + searchExp) ;
URL flickrUrl = getSearchURL(searchExp) ;
JSONObject data = tryToGetSearchResult(flickrUrl);
return new JSONWithPadding(data, callback);
}
private URL getSearchURL(String searchExp) {
String composedURL = FLICKR_API + searchExp;
try {
return new URL(composedURL);
} catch (MalformedURLException e) {
e.printStackTrace();
throw new RuntimeException("URL composition failed. Please check your URL: " + composedURL, e) ;
}
}
private JSONObject tryToGetSearchResult(URL flickrUrl) {
try {
return getSearchResult(flickrUrl) ;
} catch (IOException | JSONException e) {
e.printStackTrace();
throw new RuntimeException("Failed searching.", e) ;
}
}
private JSONObject getSearchResult(URL flickrUrl) throws IOException, JSONException {
InputStream is = flickrUrl.openStream() ;
String result = readDataFromStream(is);
// Flickr specific string prefix for the JSON feed.
if(result.indexOf("jsonFlickrFeed(") >= 0) {
result = result.substring("jsonFlickrFeed(".length(), result.length()-1) ;
return new JSONObject(result) ;
} else {
return new JSONObject("{}") ;
}
}
private String readDataFromStream(InputStream is) throws IOException {
StringBuilder data = new StringBuilder() ;
byte[] buffer = new byte[BUFFER_SIZE_IN_BYTES] ;
int bytesRead = is.read(buffer) ;
while(bytesRead != -1) {
data.append(new String(buffer, 0, bytesRead)) ;
bytesRead = is.read(buffer) ;
}
is.close() ;
return data.toString() ;
}
}
That's it. This our REST service, and we are exposing our API by using the @Path annotations
on the class and on the public method getPhotos. There are also other annotations such as the
@GET annotation and the @Produces annotation which state that the method is invoked on
an HTTP GET, and returns (@Produces annotation) a JSON (with Padding eventually = JSONP) object.
As you can see, in the class, we are using a Flickr API to get our images data from.
Now all that's left in order to make this service work, is to define the Jersey servlet in the web.xml file,
which is done this way:
<web-app>
...
<servlet>
<servlet-name>Jersey REST Service</servlet-name>
<servlet-class>com.sun.jersey.spi.container.servlet.ServletContainer</servlet-class>
<init-param>
<param-name>com.sun.jersey.config.property.packages</param-name>
<param-value>quickpik.server.web</param-value>
</init-param>
</servlet>
<servlet-mapping>
<servlet-name>Jersey REST Service</servlet-name>
<url-pattern>/rest/*</url-pattern>
</servlet-mapping>
...
</web-app>
After doing that, we're able to refer to our REST service by using a URL in the browser:
http://localhost:8080/<web-app-name>/rest/quickpik/searchPhotos?searchExp=<our-search-term>
In order to verify this worked indeed and to get a better understanding of how the strucutre of our JSON result looks like, before even writing code to the GWT Chrome extension client,
i did a small test using jQuery, to see whether this worked. - You can find it in the GitHub repository.
What I did in a nutshell, was to call the REST API:
$.getJSON('http://localhost:8080/qpserver/rest/quickpik/searchPhotos?searchExp=hello&callback=?', jsonCB);
So I executed an AJAX call to search for "hello", and passed a callback - jsonCB to process the result.
jsonCB looks like this:
function jsonCB(result) {
console.log(result);
if (result !== null && result) {
if (result.items.length === 0) {
$($("#serverResponses")[0]).append("No results.")
} else {
for (item in result.items) {
var url = result.items[item].media.m;
var imgItem = document.createElement('img');
imgItem.src = url;
$($("#serverResponses")[0]).append("Server response: ")
.append(url).append("<br>");
$($("#serverResponses")[0]).append(imgItem).append("<br>");
}
}
}
}
Note the highlighted text! - This is how we get the URL information of the photo items being sent back to us from the server.
So now we know that inside "result" which is a JSON object, resides an array of objects, that contain each
an object called media with a field called m.
You can discover this by simply debugging the returned values from the Server in the browser.
So now, we can finally add some code to our GWT Client.
Client side - GWT Chrome extension
In the previous posts of QuickPik, you might have noticed, that in order to add an additional ImageDataSource, all you need is to implement an Interface IImagesDataSource and add that ImageDataSource to the DataSource enum.
It's much easier than it sounds.
So we need to do the following:
1. Write an ImageDataSource that "talks" to our Server.
2. Edit the manifest.json file to allow communication to our server in order to comply with the
"Content Security Policy" of Chrome's extensions.
IImageDataSource implementation - ServerDS
public class ServerDS implements IImagesDataSource {
private final static String QUICKPIK_SERVER_URL =
"http://localhost:8080/qpserver/rest/quickpik/searchPhotos?searchExp=" ;
...
@Override
public void getImages(final String searchExpression, final FilterLevel filter,
final Callback<PhotosSearchResult, Void> callback) {
String url = QUICKPIK_SERVER_URL + searchExpression ;
JsonpRequestBuilder jsonp = new JsonpRequestBuilder();
jsonp.requestObject(url, new AsyncCallback<ServerResult>() {
public void onFailure(Throwable throwable) {
// do some error handling..
}
public void onSuccess(ServerResult result) {
handleLoadedImagesResult(searchExpression, filter, result, callback) ;
}
});
}
private void handleLoadedImagesResult(String searchExpression, FilterLevel filter, ServerResult result,
Callback<PhotosSearchResult, Void> callback) {
JsArray<ServerImageItem> imageItems = result.getItems();
LinkedList<Photo> photos = collectImages(imageItems);
callback.onSuccess(new PhotosSearchResult(searchExpression, filter, photos, 0, false)) ;
}
private LinkedList<Photo> collectImages(JsArray<ServerImageItem> imageItems) {
LinkedList<Photo> photos = new LinkedList<Photo>();
for (int i = 0; i < imageItems.length(); i++) {
ServerImageItem imageItem = imageItems.get(i);
Photo p = new Photo(i+"", imageItem.getImageURL(), imageItem.getImageURL()) ;
photos.add(p) ;
}
return photos;
}
}
I'll try to explain the code very shortly:
1. At the top of the class you can locate the URL to the server we will be using to get the images from.
2. getImages method which must be implemented is passed a searchExpression a filter and
a callback. We will ignore the filter to make things simpler.
GWT offers a class called JsonpRequestBuilder which allows us to invoke an asynchrounous
call to the server, and passing a callback to deal with the result of the invocation.
3. If the call was successful, we have to handle the result somehow. We do that by calling a handle method.
4. In the handleLoadedImagesResult method, we got an object called ServerResult.
ServerResult is a custom object created especially for this operation. It is a wrapper to
a JavaScriptObject, that gives access to the result.items object array. (Remember from the jQuery test?)
This is how ServerResult looks like:
public class ServerResult extends JavaScriptObject {
protected ServerResult() {
}
public final native JsArray<ServerImageItem> getItems() /*-{
return this.items ;
}-*/;
}
The native getItems method, is a convention of GWT to write JavaScript code to the underlying JavaScriptObject that the Java object wraps. So when you invoke getItems, behind the scenes the
JavaScript code "return this.items" is executed, returning the JavaScript items Array.
I also mapped the objects in this array to a Java object in the same way I did with ServerResult.
Following the same idea, ServerImageItem looks like this:
public class ServerImageItem extends JavaScriptObject {
protected ServerImageItem() {
}
public final native String getImageURL() /*-{
return this.media.m ;
}-*/;
}
So after this long explanation, all we do in the "handle" method, is basically gathering all of our
images URLs, creating a Photo list, like expected in the callback passed to us in the getImages method
invocation and invoking the callback, passing it an expected PhotoSearchResult object containing
our Photos.
5. Now we must add our ServerDS to the DataSource enum, so it will be included as a data source
when we run a search.
We do that simply by adding the (bolded) line below:
Notice how I intentionally turned off FLICKR Data Source, setting its isEnabled flag to false.
6. Last thing that needs to be done, is to enable our Chrome extension to make calls to our server by
editing the manifest.json file, adding the following line to it:
That's all folks, all you need to do now, is build the Server (I did it with Gradle in this project), compile
your GWT client, deploy it on Chrome and watch it work.
You can access all the code on GitHub, and download it.
Code on GitHub
All of the project's code can be found on GitHub at: https://github.com/nirgit/Quickpik-with-server
GWT Chrome extensions, with a connection to a server of their own.
While this demonstrates specifically how to enable to communication from a Chrome extension, there is
no difference in code if you wish to deploy your client code else where (not on Chrome).
Many web applications choose to deploy their Server code & Client code on the same application server, like JBoss or Tomcat.
As you know in GWT there are several ways to communicate with a server.
One of them is RPC for instance, which gives you the ability to invoke methods on a Java interface,
not having to deal with anything but Java code. Which is cool, as it makes a very smooth transition from
the client side code to the server side code.
However, when we want to implement this in a Chrome extension things get a bit trickier.
The reason is that you'd have to separate your server module from your Chrome extension module
(as we can't deploy Server side classes to Chrome - it runs only JavaScript),
and would need a shared model between the two in order to communicate.
It's not hard to do at all, it's only a longer example to make.
(In Eclipse, if you create a new "Web Application Project" using Google's plugin, you will have the client & server code in the same project, with a "shared" directory which serves a model bridge between the two).
Another option that exists, is using JSONP communication to the server.
In our case - this makes it a lot simpler.
We will expose some REST API on a Server we'll implement, for getting images, and send a JSONP request from the QuickPik extension to retrieve those images. Obviously, it can be anything else you want it to be in your application.
TO THE CODE!!!
The Server
In order to create a REST service and expose it, we will use the Jersey library which is an implementation for
building RESTful web services. It's very simple.
The following QuickpikService class, is our REST service:
package quickpik.server.web;
import java.io.IOException;
import java.io.InputStream;
import java.net.MalformedURLException;
import java.net.URL;
import java.util.Date;
import javax.ws.rs.GET;
import javax.ws.rs.Path;
import javax.ws.rs.Produces;
import javax.ws.rs.QueryParam;
import javax.ws.rs.core.MediaType;
import org.codehaus.jettison.json.JSONException;
import org.codehaus.jettison.json.JSONObject;
import com.sun.jersey.api.json.JSONWithPadding;
@Path("/quickpik")
public class QuickPikService {
private final static int BUFFER_SIZE_IN_BYTES = 1024;
private final static String FLICKR_API = "http://api.flickr.com/services/feeds/photos_public.gne?format=json&tagmode=all&tags=" ;
@GET
@Path("searchPhotos")
@Produces({ "application/x-javascript", MediaType.APPLICATION_JSON})
public JSONWithPadding getPhotos(@QueryParam("searchExp") String searchExp,
@QueryParam("callback") String callback) {
// "log" the call
System.out.println("[" + new Date() + "] searching for: " + searchExp) ;
URL flickrUrl = getSearchURL(searchExp) ;
JSONObject data = tryToGetSearchResult(flickrUrl);
return new JSONWithPadding(data, callback);
}
private URL getSearchURL(String searchExp) {
String composedURL = FLICKR_API + searchExp;
try {
return new URL(composedURL);
} catch (MalformedURLException e) {
e.printStackTrace();
throw new RuntimeException("URL composition failed. Please check your URL: " + composedURL, e) ;
}
}
private JSONObject tryToGetSearchResult(URL flickrUrl) {
try {
return getSearchResult(flickrUrl) ;
} catch (IOException | JSONException e) {
e.printStackTrace();
throw new RuntimeException("Failed searching.", e) ;
}
}
private JSONObject getSearchResult(URL flickrUrl) throws IOException, JSONException {
InputStream is = flickrUrl.openStream() ;
String result = readDataFromStream(is);
// Flickr specific string prefix for the JSON feed.
if(result.indexOf("jsonFlickrFeed(") >= 0) {
result = result.substring("jsonFlickrFeed(".length(), result.length()-1) ;
return new JSONObject(result) ;
} else {
return new JSONObject("{}") ;
}
}
private String readDataFromStream(InputStream is) throws IOException {
StringBuilder data = new StringBuilder() ;
byte[] buffer = new byte[BUFFER_SIZE_IN_BYTES] ;
int bytesRead = is.read(buffer) ;
while(bytesRead != -1) {
data.append(new String(buffer, 0, bytesRead)) ;
bytesRead = is.read(buffer) ;
}
is.close() ;
return data.toString() ;
}
}
That's it. This our REST service, and we are exposing our API by using the @Path annotations
on the class and on the public method getPhotos. There are also other annotations such as the
@GET annotation and the @Produces annotation which state that the method is invoked on
an HTTP GET, and returns (@Produces annotation) a JSON (with Padding eventually = JSONP) object.
As you can see, in the class, we are using a Flickr API to get our images data from.
Now all that's left in order to make this service work, is to define the Jersey servlet in the web.xml file,
which is done this way:
<web-app>
...
<servlet>
<servlet-name>Jersey REST Service</servlet-name>
<servlet-class>com.sun.jersey.spi.container.servlet.ServletContainer</servlet-class>
<init-param>
<param-name>com.sun.jersey.config.property.packages</param-name>
<param-value>quickpik.server.web</param-value>
</init-param>
</servlet>
<servlet-mapping>
<servlet-name>Jersey REST Service</servlet-name>
<url-pattern>/rest/*</url-pattern>
</servlet-mapping>
...
</web-app>
After doing that, we're able to refer to our REST service by using a URL in the browser:
http://localhost:8080/<web-app-name>/rest/quickpik/searchPhotos?searchExp=<our-search-term>
In order to verify this worked indeed and to get a better understanding of how the strucutre of our JSON result looks like, before even writing code to the GWT Chrome extension client,
i did a small test using jQuery, to see whether this worked. - You can find it in the GitHub repository.
What I did in a nutshell, was to call the REST API:
$.getJSON('http://localhost:8080/qpserver/rest/quickpik/searchPhotos?searchExp=hello&callback=?', jsonCB);
So I executed an AJAX call to search for "hello", and passed a callback - jsonCB to process the result.
jsonCB looks like this:
function jsonCB(result) {
console.log(result);
if (result !== null && result) {
if (result.items.length === 0) {
$($("#serverResponses")[0]).append("No results.")
} else {
for (item in result.items) {
var url = result.items[item].media.m;
var imgItem = document.createElement('img');
imgItem.src = url;
$($("#serverResponses")[0]).append("Server response: ")
.append(url).append("<br>");
$($("#serverResponses")[0]).append(imgItem).append("<br>");
}
}
}
}
Note the highlighted text! - This is how we get the URL information of the photo items being sent back to us from the server.
So now we know that inside "result" which is a JSON object, resides an array of objects, that contain each
an object called media with a field called m.
You can discover this by simply debugging the returned values from the Server in the browser.
So now, we can finally add some code to our GWT Client.
Client side - GWT Chrome extension
In the previous posts of QuickPik, you might have noticed, that in order to add an additional ImageDataSource, all you need is to implement an Interface IImagesDataSource and add that ImageDataSource to the DataSource enum.
It's much easier than it sounds.
So we need to do the following:
1. Write an ImageDataSource that "talks" to our Server.
2. Edit the manifest.json file to allow communication to our server in order to comply with the
"Content Security Policy" of Chrome's extensions.
IImageDataSource implementation - ServerDS
public class ServerDS implements IImagesDataSource {
private final static String QUICKPIK_SERVER_URL =
"http://localhost:8080/qpserver/rest/quickpik/searchPhotos?searchExp=" ;
...
@Override
public void getImages(final String searchExpression, final FilterLevel filter,
final Callback<PhotosSearchResult, Void> callback) {
String url = QUICKPIK_SERVER_URL + searchExpression ;
JsonpRequestBuilder jsonp = new JsonpRequestBuilder();
jsonp.requestObject(url, new AsyncCallback<ServerResult>() {
public void onFailure(Throwable throwable) {
// do some error handling..
}
public void onSuccess(ServerResult result) {
handleLoadedImagesResult(searchExpression, filter, result, callback) ;
}
});
}
private void handleLoadedImagesResult(String searchExpression, FilterLevel filter, ServerResult result,
Callback<PhotosSearchResult, Void> callback) {
JsArray<ServerImageItem> imageItems = result.getItems();
LinkedList<Photo> photos = collectImages(imageItems);
callback.onSuccess(new PhotosSearchResult(searchExpression, filter, photos, 0, false)) ;
}
private LinkedList<Photo> collectImages(JsArray<ServerImageItem> imageItems) {
LinkedList<Photo> photos = new LinkedList<Photo>();
for (int i = 0; i < imageItems.length(); i++) {
ServerImageItem imageItem = imageItems.get(i);
Photo p = new Photo(i+"", imageItem.getImageURL(), imageItem.getImageURL()) ;
photos.add(p) ;
}
return photos;
}
}
I'll try to explain the code very shortly:
1. At the top of the class you can locate the URL to the server we will be using to get the images from.
2. getImages method which must be implemented is passed a searchExpression a filter and
a callback. We will ignore the filter to make things simpler.
GWT offers a class called JsonpRequestBuilder which allows us to invoke an asynchrounous
call to the server, and passing a callback to deal with the result of the invocation.
3. If the call was successful, we have to handle the result somehow. We do that by calling a handle method.
4. In the handleLoadedImagesResult method, we got an object called ServerResult.
ServerResult is a custom object created especially for this operation. It is a wrapper to
a JavaScriptObject, that gives access to the result.items object array. (Remember from the jQuery test?)
This is how ServerResult looks like:
public class ServerResult extends JavaScriptObject {
protected ServerResult() {
}
public final native JsArray<ServerImageItem> getItems() /*-{
return this.items ;
}-*/;
}
JavaScript code "return this.items" is executed, returning the JavaScript items Array.
I also mapped the objects in this array to a Java object in the same way I did with ServerResult.
Following the same idea, ServerImageItem looks like this:
public class ServerImageItem extends JavaScriptObject {
protected ServerImageItem() {
}
public final native String getImageURL() /*-{
return this.media.m ;
}-*/;
}
Here we use getImageURL method to return the (JavaScript) object's media.m property.
(This is exactly the same structure that was referred to when testing with jQuery above).
So after this long explanation, all we do in the "handle" method, is basically gathering all of our
images URLs, creating a Photo list, like expected in the callback passed to us in the getImages method
invocation and invoking the callback, passing it an expected PhotoSearchResult object containing
our Photos.
5. Now we must add our ServerDS to the DataSource enum, so it will be included as a data source
when we run a search.
We do that simply by adding the (bolded) line below:
public enum DataSource {
// add here your data sources
FLICKR(false, new FlickrDS()),
QUICKPIK_SERVER(true, new ServerDS())
;
....
}
// add here your data sources
FLICKR(false, new FlickrDS()),
QUICKPIK_SERVER(true, new ServerDS())
;
....
}
Notice how I intentionally turned off FLICKR Data Source, setting its isEnabled flag to false.
6. Last thing that needs to be done, is to enable our Chrome extension to make calls to our server by
editing the manifest.json file, adding the following line to it:
{
....
// A relaxed policy definition which allows script resources to be loaded from localhost:8080 over HTTP
"content_security_policy": "script-src 'self' http://localhost:8080; object-src 'self'"
}
....
// A relaxed policy definition which allows script resources to be loaded from localhost:8080 over HTTP
"content_security_policy": "script-src 'self' http://localhost:8080; object-src 'self'"
}
That's all folks, all you need to do now, is build the Server (I did it with Gradle in this project), compile
your GWT client, deploy it on Chrome and watch it work.
You can access all the code on GitHub, and download it.
Code on GitHub
All of the project's code can be found on GitHub at: https://github.com/nirgit/Quickpik-with-server
Wednesday, November 28, 2012
GWT HTML5 Game Example - Pong
Hi everyone,
This post is intended to present a very simple example of a game, made with the HTML5 support of GWT.
The game uses only GWT, without any other 3rd party libraries such as PlayN which works with GWT and is rather famous and meant for creating games based on HTML5.
Take a look at PlayN's website: http://code.google.com/p/playn/
GWT provides an API to the underlying HTML5 Canvas, and lets you use it to create
custom graphics.
This example shows the game of Pong. Though the game might be a little buggy, it nevertheless makes use of the fundamental HTML5 Canvas features, such as drawing simple geometric shapes, such as rectangles, circles, gradients and with those elements creating a very simple and compact code for a game.
You can find all the code on GitHub for you to clone: https://github.com/nirgit/GwtPong
Click the screenshot to play:
Have fun playing!
This post is intended to present a very simple example of a game, made with the HTML5 support of GWT.
The game uses only GWT, without any other 3rd party libraries such as PlayN which works with GWT and is rather famous and meant for creating games based on HTML5.
Take a look at PlayN's website: http://code.google.com/p/playn/
GWT provides an API to the underlying HTML5 Canvas, and lets you use it to create
custom graphics.
This example shows the game of Pong. Though the game might be a little buggy, it nevertheless makes use of the fundamental HTML5 Canvas features, such as drawing simple geometric shapes, such as rectangles, circles, gradients and with those elements creating a very simple and compact code for a game.
You can find all the code on GitHub for you to clone: https://github.com/nirgit/GwtPong
Click the screenshot to play:
Have fun playing!
Wednesday, July 11, 2012
Source on a Github repository
Hey everyone,
This is a really short note.
From now on, in case I will publish more code in the future I will try to make sure it is uploaded
to Github, so anyone could profit from it.
The Github repository URL: https://github.com/nirgit
Enjoy.
Monday, July 9, 2012
Quickpik - GWT Chrome extension - Search photos
As a continuation to my previous post, this isn't about discussing anything.
It is about doing - giving an example of something quite simple & cool which you could do yourself using GWT, to build a chrome extension.
Being a bit of a GWT enthusiast, I built an extension for Google Chrome called QuickPik - which allows users to search for images from right from the toolbar.
Quickpik is using Google Images & Flickr (Yahoo) APIs.
You can run a simple search, and get some images as results. It's really simple.
You can just download the zip file from the link below, extract it and install the .crx file right into Google Chrome by dragging the file into it. If you're scared of some evil code running on your browser - just open the source code in the zip file, build the extension yourself, and then install it.
Keep in mind that the idea of this post is to show how easy it is to create a
cool extension for Chrome.
The code might not be extremely well documented, nor does it strictly follow Google's best practices like the MVP pattern or bundling CSS or Image resources and so on, but...
You can expect something compact and simple enough once you open it and take a look.
I don't think there should be a problem understanding much of the code.
Would love to get feedback if this helped anyone.
Both source code & Chrome extension below are available to download in one zip file.
Have fun !!!
The project on Github: https://github.com/nirgit/Quickpik
A Zip file to download: http://www18.zippyshare.com/v/16094412/file.html
Subscribe to:
Posts (Atom)